
Ever wondered if you could repurpose common gadgets for other uses? This article steps through the intriguing process of making a taser out of a disposable camera. Such a project demands not just creativity but also a solid understanding of how to safely harness and modify the camera’s inherent capabilities – particularly how camera flashes charge a capacitor to high voltage. While constructing a homemade electrical defense tool is certainly feasible, it’s imperative to emphasize that this should be purely for educational pursuits; using this device could have legal implications and pose safety risks.
Introduction to DIY Electrical Projects
With an interest in DIY projects and a spark of creativity, transforming a simple piece of technology into a working tool is an enlightening endeavor. It provides invaluable insights into the mechanisms that power everyday gadgets, all while enhancing your technical skills.
Understanding the Basics of a Taser
A taser, commonly mistaken for a stun gun, incapacitates a target by delivering a high-voltage electric shock. It’s significant to note the principle at work behind this stun device is remarkably similar to how to make a stun gun with a capacitor, harnessing electrical energy and releasing it quickly.
Essential Safety Precautions
Engaging in electrical DIY projects like making a taser out of a disposable camera involves a great deal of caution. Protect yourself by using non-conductive tools, working in an environment free from water, and ensuring that you’re wearing appropriate protective gear – such as rubber gloves and safety glasses.
Tools and Materials
Selecting the correct tools and materials is a pivotal first step towards the successful completion of any project.
Gathering Your Supplies
- A disposable camera with a flash feature
- Insulated pliers
- Screwdrivers
- Soldering iron and solder
- Electrical tape or heat shrink tubing
- Wire cutters and stripers
- A pair of rubber gloves for safety
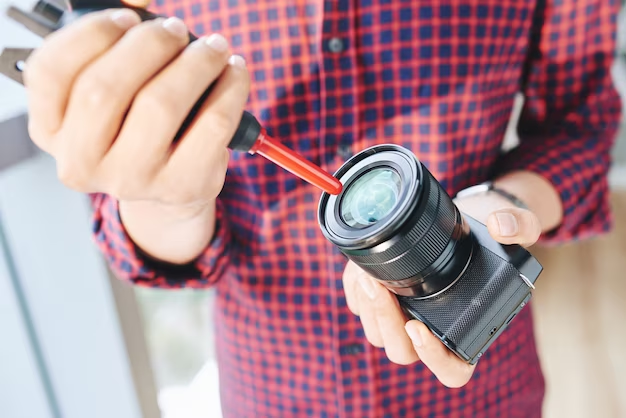
To proceed with this project, you will require items like a soldering kit, electrical tape, and, of course, a disposable camera. It’s this camera’s ability to charge a capacitor to high voltage for the flash mechanism that we will adapt for our taser.
Overview of the Disposable Camera Components
An understanding of the disposable camera’s internal mechanisms is vital. A key component to pay close attention to is the capacitor, which is responsible for powering the flash – this same camera flashes charge a capacitor to high voltage, which is the basis for our taser design.
Disassembling the Disposable Camera
Cautiously taking apart the camera is essential to protect both the components to be reused and yourself against any accidental electrical discharge.
Safe Removal of Camera Parts
A screwdriver and careful hands are needed to open the camera’s case, while insulated pliers are essential for handling the charged parts, especially when discharging the high voltage capacitor.
Identifying the Capacitor
Correctly identifying and then safely discharging the capacitor are primary steps in the initial disassembly stage. Camera flashes charge a capacitor to high voltage, and this stored energy can be repurposed for our stun device, but it must be treated with the utmost respect and careful handling.
Constructing the Taser
Having taken apart the camera and understood what goes into creating a makeshift stun device, the actual construction can begin.
Preparing the Circuit
The camera’s circuit board and the capacitor, once charged by the camera flash, form the heart of your DIY taser. You’ll need to ready these components by ensuring the capacitor is safely discharged, then attaching new leads to interface with the taser mechanism.
Assembling the Electrodes
The electrodes are going to deliver the charge from the capacitor to the intended target. In the case of our project, these could be fashioned from sturdy metal screws that, when positioned correctly, allow the high voltage to arc safely when the device is activated.
Insulating Your Device
Finally, given that camera flashes charge a capacitor to high voltage, insulating your DIY taser to prevent accidental discharges is non-negotiable. Properly covering any exposed wires and the capacitor itself with electrical tape is a critical step toward ensuring the safety of anyone handling the taser.
| Step | Description |
|---|---|
| Discharging the Capacitor | Ensure all energy, stored by camera flashes, is released from the capacitor |
| Removing the Circuit Board | Extract the board without causing damage to the components |
| Preparing the Components | Solder leads and insulate as needed |
| Assembling Electrodes | Attach electrodes making sure they are properly aligned |
| Insulating the Assembly | Cover all exposed parts with electrical tape |
| Testing | Check the circuit with the battery disconnected |
Part one of this process is now complete. You’ve taken the necessary safety precautions, gathered your materials, disassembled your disposable camera, and begun constructing the taser. As we progress through the construction phase, these foundational steps will support the successful creation of a working stun device.
Finalizing Your DIY Taser
Having insulated our device and prepped the electrodes, we’re moving toward the completion of our taser. The focus is now on integrating all the components to work harmoniously, and ensuring that the already potent energy stored within the camera’s capacitor can be released in a controlled and deliberate manner.
Testing the Device Safely
Once your device is assembled, it’s time to test its functionality. Remember, this is the most hazardous part of the project, so do not rush. You want to be sure that your taser works without posing a risk to yourself or others.
- Ensure that you are in a dry area, free from flammable materials.
- Place the taser on an insulated surface, away from your body.
- Reconnect the battery carefully.
- Activate the device momentarily to check for a spark between the electrodes.
If you observe a spark, the taser is working. However, if you encounter any issues, disconnect the battery immediately and review your setup for any mistakes.
Troubleshooting Common Issues
If the device fails to produce a spark, check the connections and the integrity of your components. A common problem often lies in a poor solder joint or a misplaced wire. Always double-check the distance between the electrodes, as they may need to be adjusted slightly closer together to facilitate the arc.

Conclusion and Safety Reminders
The finalization of your DIY taser project is a testament to your ability to combine technical knowledge with prudent caution. This homemade device offers an insight into how a taser works, and it serves as a formidable example of how electronic principles can manifest in practical applications. However, it cannot be stressed enough that the use of such a device should only be for educational purposes. Improper use can carry severe legal repercussions and pose significant safety risks.
FAQs
- Is it legal to build a taser? It depends on local laws and regulations. In some areas, owning or constructing a taser or stun device may be illegal. It’s essential to research and abide by your area’s legal guidelines before attempting this project.
- What distance should the electrodes be to create an effective spark? Typically, electrodes should be close enough to allow the electric charge to arc between them reliably. This usually means a few millimeters apart, but the exact distance can vary depending on the voltage and other factors.
- Can this homemade taser cause harm like a commercially manufactured one? While the DIY taser may not be as potent as commercial-grade devices, it can still be dangerous and cause harm or injury. It should be treated with caution and not used on any person or animal.
- How long will the charge last in the DIY taser? The charge in the capacitor will dissipate over time when disconnected from a power source. For the taser to be effective, the capacitor must be recharged before each test or use.
- How can I safely dispose of the DIY taser if I no longer want to keep it? To safely dispose of the DIY taser, you must safely discharge the capacitor and then dismantle the device. Properly recycle electronic parts and dispose of any hazardous materials according to local environmental regulations.